In my previous post I mentioned that Outline 4D (formerly known as StoryView) has become an integral part of my academic writing workflow, as my tool of choice for writing the first draft. O4D may sound like a surprising choice for this, and its emergence as such was unexpected for me as well.
O4D is primarily known as a scriptwriting tool or an outliner targeting creative writers. It is quite old and it no longer seems to be developed. Originally I thought I would be using ConnectedText, Scrivener for Windows, MS Word 2010 or LibreOffice for writing up my PhD thesis. But through a trial and error process Outline 4D has emerged as the winner.
The main reason for this surprising development has to do with the fact that Outline 4D is a single-pane outliner with inline notes capability and with a wide range of visualisation options, which make it particularly suitable for both writing (as in developing sentences and paragraphs) and for reverse outlining (structuring the developing draft into a logical hierarchical structure). There are surprisingly few single-pane outliners with inline notes. I’ve tried them all and O4D is the most versatile in terms of visualisation and the speediest in terms of writing and reverse outlining operations.
Why not use a dual-pane outliner and writing tool such as Scrivener or a word processor such as MS Word or LibreOffice with navigation pane enabled? The main reason is that in a dual-pane tool you can’t just collapse and expand an arbitrary selection of sections and hierarchical levels to make only a particular part of the outline structure visible and still be able to work on a section of your choice for which that particular view is relevant.
Also, it’s just more helpful to be able to view the “headings” (“titles” in O4D) within the same pane, rather than have to look for them in a second pane. I will provide a screenshot below to illustrate how this is done in Outline 4D. Before I get to that one though, let me just walk you through the main options for visualising your developing draft in O4D.
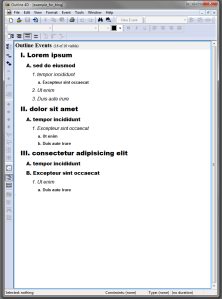
First, let’s take a look at the plainest view. You have a classical single-pane outliner with inline notes here. O4D allows you to customise the font and the background of each hierarchical level of the text. Each outline item or text snippet (called “event” in O4D, reflecting its scriptwriting origins) consists of a title and the inline note (called “content”). Both are optional, i.e. you don’t need to have a title if you don’t need one, and you don’t need to add content to the title if you don’t want to.
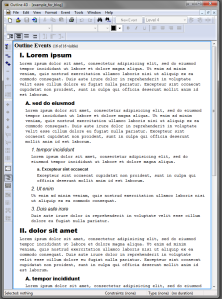 This text can be viewed (in the main “Outline View,” as opposed to the “Timeline View,” which I’m not going to discuss here) in four different ways, which I find extremely helpful. The first one can be seen in the screenshot above, which shows both “Titles and Content (Ctrl+Shift+8).” This is the most complete view, i.e. all the textual content is visible.
However, if you’d like to view the underlying logical structure only (as marked up by the various headings and sub-headings), you can click on “Titles Only (Ctrl+Shift+9),” and you get the following skeletal view, which hides all the inline notes (content):
I like to add a heading or sub-heading to every single paragraph that I write, so that the above two views provide me with an overview of my entire logical argument and content. With a large document (10,000 words is a typical length for a PhD thesis chapter), this may at one point become overwhelming and you may just want to view the text itself, without all the headings and sub-headings. This can be easily achieved by hitting the “Content Only (Ctrl+Shift+0)” button. All you see here is the content of your paragraphs:
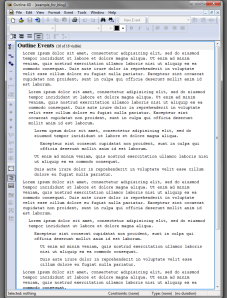 If this was not enough flexibility for viewing your content in different ways, there is still the “Custom Visibility (Ctrl+Shift+7)” option. It allows you to individually customise every single item (title + content, which for me equals a paragraph and its topic) in your document, so you can hide for example meta commentary that is not strictly part of your text.
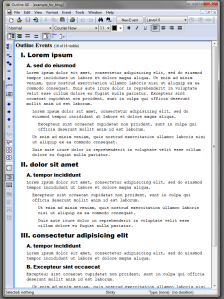
The beauty of O4D is that these views are not just there for visualising the text differently on your screen but you can also print or export your text as an RTF file in the selected view. Even the word count tool allows you to exclude event titles or only include selected “events” (outline items). Here is an example of a custom view. I hid the contents for level 1 titles and I hid the titles for level 3 and 4 content.
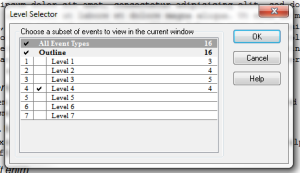
 And there is more. There is also something called the Level Selector, which allows you to select text residing at a particular hierarchical level in the outline to be displayed on its own. Here I deselected all levels except Level 4:
 And this is what “Level 4 text only” looks like:
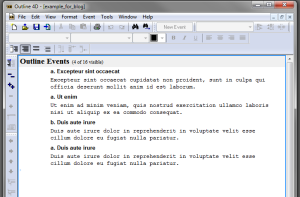 I haven’t used this feature yet for my current project but I could see it becoming useful once large texts become available and let’s say I’d only like to see the Level 1 text, which would be all the introductions to various sections, thus giving a quick overview of the overall project, allowing me to check for logical consistency, ease of comprehension and transition between sections.
Until now I have kept colour out of this discussion, as I didn’t want it to be a distraction while discussing the above features. But when it comes to outlining, I’ve always found the ability to colour in an outline on the basis of hierarchical level very useful, as it just makes the navigation of the outline and comprehension of its logical structure so much easier. (This is one reason why I love Natara Bonsai so much. Sadly Bonsai doesn’t have inline notes.)
When it comes to adding colour, one is spoilt for choice in Outline 4D. First, O4D allows you to customise your font colour on the basis of the hierarchical level, so you can have different colours for both the title and the content for each level. This works automatically, every time you add a new section. Here is an example with different font colours for item contents:
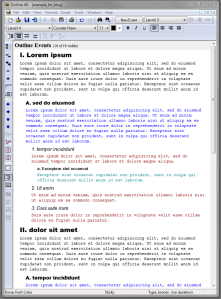 Personally I don’t use this feature in O4D, as I find it too busy for viewing inline notes (although I use it a lot in Bonsai for a regular outline without inline notes). Instead, I prefer to colour in the background of the outline items. There are several options for that. Similarly to the font colour, you can customise background colour per hierarchical level (but there are other options as well).
A discreet and quick way to turn on a partial background view is by clicking on the “Toggle Structure Column” button, which brings up the Structure Column that shows the hierarchical relationships between the outline items and shows a bit of their background colour:
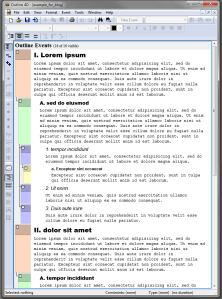 It is also possible to colour in the entire background of the outline items (these obviously change automatically when you indent or outdent an item):
 It depends on the stage of the writing and the particular writing or editing task whether I opt for a distraction-free all-white background or I turn on a partial or full background-coloured view.
Here is a screenshot I promised at the beginning of this post to illustrate why I find O4D better for reverse outlining than dual-pane outline setups like Scrivener, WhizFolders or MS Word 2010 with navigation pane. Here I collapsed Part I and Part III completely, so I can focus on Part II. Even within Part II, I can selectively collapse or expand particular sections, depending on whether I need to see them during the writing process.
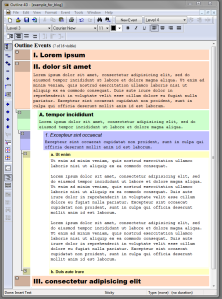 Here I’m working on the section entitled “Ut enim.” You can see that the body of the active section has a white background, which makes it easier to see where you are and also to indicate that work is being done here. I have written three paragraphs already, so the next step would be to do the “reverse outlining,” which would involve splitting off these paragraphs into their independent sections, giving them a title that summarises them, and indenting or outdenting them according to how they fit into the overall train of thought logically.
Finally, it is also possible to mark up the inline text with a limited selection of rich text formatting. There is yellow highlighting only, bold, italics, underlining, and you can also change the font colour further. It is possible to designate URLs and email addresses as such, but they would only become functional after the text has been exported as RTF.
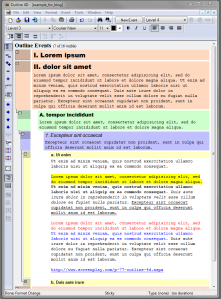 I don’t tend to bother much with formatting my text because here I want to concentrate on writing, not on word processing. Outline 4D is not compatible with citation software either but that doesn’t bother me, as I find using EndNote referencing during writing distracting anyway. Instead, I just type my references manually such as (Smith 2010: 345), and then I replace them with EndNote references once I’ve exported the completed draft into Word.
Another useful characteristic of O4D is its multiple document interface (MDI). This means that you can open and display multiple O4D documents within a single window. This becomes useful when you want to compare multiple documents (e.g. different versions of a draft) and edit them simultaneously. Here is a view of eight O4D documents tiled vertically across two monitors:
The downside of MDI is that you can only run one instance of O4D, which makes it a bit awkward (but not impossible) to view a set of O4D documents in one monitor and write another O4D document in another monitor. I get around this restriction by doing the writing in StoryView, which is an earlier (and 99% identical) version of O4D. If you decide to buy O4D, it’s worth asking the developer or the retailer whether they can also give you a licence for StoryView.
I hope I have managed to demonstrate why I think Outline 4D is an excellent writing environment for drafting and reverse outlining. As I mentioned it in my previous post, this stage for me comes after the note-taking and outlining stage, for which I prefer to use ConnectedText and Freeplane.
The next step would be to export the Outline 4D document as an RTF file, convert it into a .docx file in Word, add my EndNote references, convert the O4D headings into Word headings in order to produce a table of contents, and add any further rich text formatting necessary (which would mostly consist of adding italics for emphasis). Then it’s off to the printer.
If you decide to give Outline 4D a try on a Windows 7 machine, make sure to run it in Windows XP mode and as an administrator (right-click on icon, choose “Properties” and click on “Compatibility” tab). Even then I needed to disable “User Account Control” (UAC), to stop the annoying Windows pop-up.
I did come across one bug: it crashes sometimes if you change some options in the “Outline 4D Options” window while in “Timeline View.” So make sure to save your work before changing those options. Having said that, I haven’t lost any work in O4D so far. But I do save my work often (there is even an automatic reminder you can set to save after a given period) and export it into RTF daily, just to be on the safe side. It’s an old piece of software after all.
It’s an oldie, but a goodie!
——
Addendum (14/01/2013)
I’ve just realised that there is yet another relevant view of the outline that I forgot to add. If you select all items and click the “Summarize (Ctrl+[)” button, Outline 4D provides you with a summary view of your outline, consisting of all the titles and the first line of each content section. There is also an “Unsummarize (Ctrl+])” button to revert to the full outline. This summary view is an interim step between the “Titles Only (Ctrl+Shift+9)” view and the “Titles and Content (Ctrl+Shift+8)” view. It can be useful for skimming your document and getting an overview of the general flow and coherence of the text.
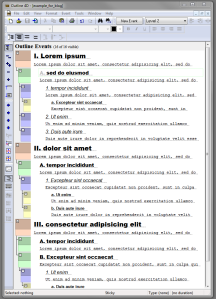 Of course there is still the “Timeline View,” but that is such a complex feature that it would take several blog posts to do justice to it. It’s like having yet another completely different piece of software, although it is intrinsically linked to the “Outline View” in some very ingenious ways. Hats off to the original developers, wherever they may be!
Addendum 2 (17/01/2013)
There is yet one more colouring-in option for Outline 4D. You can also choose “Draw Event Frames,” which is more subtle than “Draw colored event backgrounds,” as it only draws the borders of the “events” in the background colour that was selected for each hierarchical level:
 P.S. Although above I linked to the developers’ (Write Brothers) website, where you can download a 5-day trial version, if you are interested in purchasing this software, it is worth shopping around. E.g. currently the download version is $89.95 at Screenplay.com, while at the Writers Store it is $79.00. But occasionally you can get it even cheaper from Amazon (the boxed version) or from small retailers outside the US, or if you catch a promotion at Screenplay.com (it was $65.00 back in November 2012).
Addendum 3 (30/01/2013)
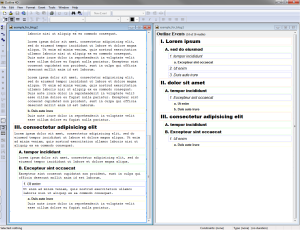
I have discovered yet another cool feature in Outline 4D (not sure what took me so long). If you find that your outline is getting too big and you’re finding it difficult to get a sense of the overall document, or if you need to look at two (or three or more) different sections of the outline that are far away from each other and can’t be viewed simultaneously, you can always open two or more versions of the same outline and tile them vertically. This way you can get two (or more) live views of the exact same document, meaning that changes are updated to all open windows. This is how you do it: go to Window > New Outline Window and then choose “Tile Vertically.” Here is an example:
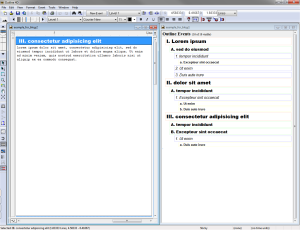
Although I said I wouldn’t mention Outline 4D’s Timeline View in this review, the previous visualisation gave me the idea that if you do the same trick with the Timeline View (i.e. go to Window > New Timeline Window > Tile Vertically), and then choose “View > Fit to view” for the index card version of the outline item you want to edit, you can emulate – and to some extent even improve upon – BrainStorm‘s famous “aerial view” or the much missed “document view” of GrandView. In the following screenshot you can see an example where an outline item is being edited as a standalone piece of text in the left window, while you can have any of the aforementioned 11 visualisations in the right (Outline view) window:
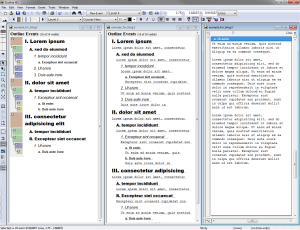
P.S. In fact this feature can turn O4D from a single-pane outliner into a dual- or even multi-pane outliner. You could have a top-level outline open in the left pane, a more detailed outline in the next pane to the right, and then the single-note (document) view in a third pane (which would make it into a three-pane outliner).
P.P.S. Here is a screenshot of Outline 4D as a three-pane outliner. The left pane is “Titles only” view; the middle pane is “Summary” view with first line of content showing, and the right pane is in “Timeline view” with “Fit to view (Ctrl+3)” on, only showing one item in focus.
